Typora+简单图床,使用自定义命令上传
Typora是我平时用的比较多的跨平台Markdown编辑器了,但是Typora本身没有图片存储,本地图片进行移动、修改文件名、删除等操作后,文章的图片就不能正常显示。并且在将文章复制到博客时,图片引用往往会出现问题,因此我需要更好的解决方案。在看到其他博主推荐后,我选择了自建Easyimages图床,配合Picgo,将图片上传至图床,但是!!!Picgo的自定义web插件不知道怎么回事,用了两天后,一直上传失败,所以我干脆使用自定义命令,将图片上传至图床了。
到这里目标就很明确了
配置脚本运行环境
编辑脚本
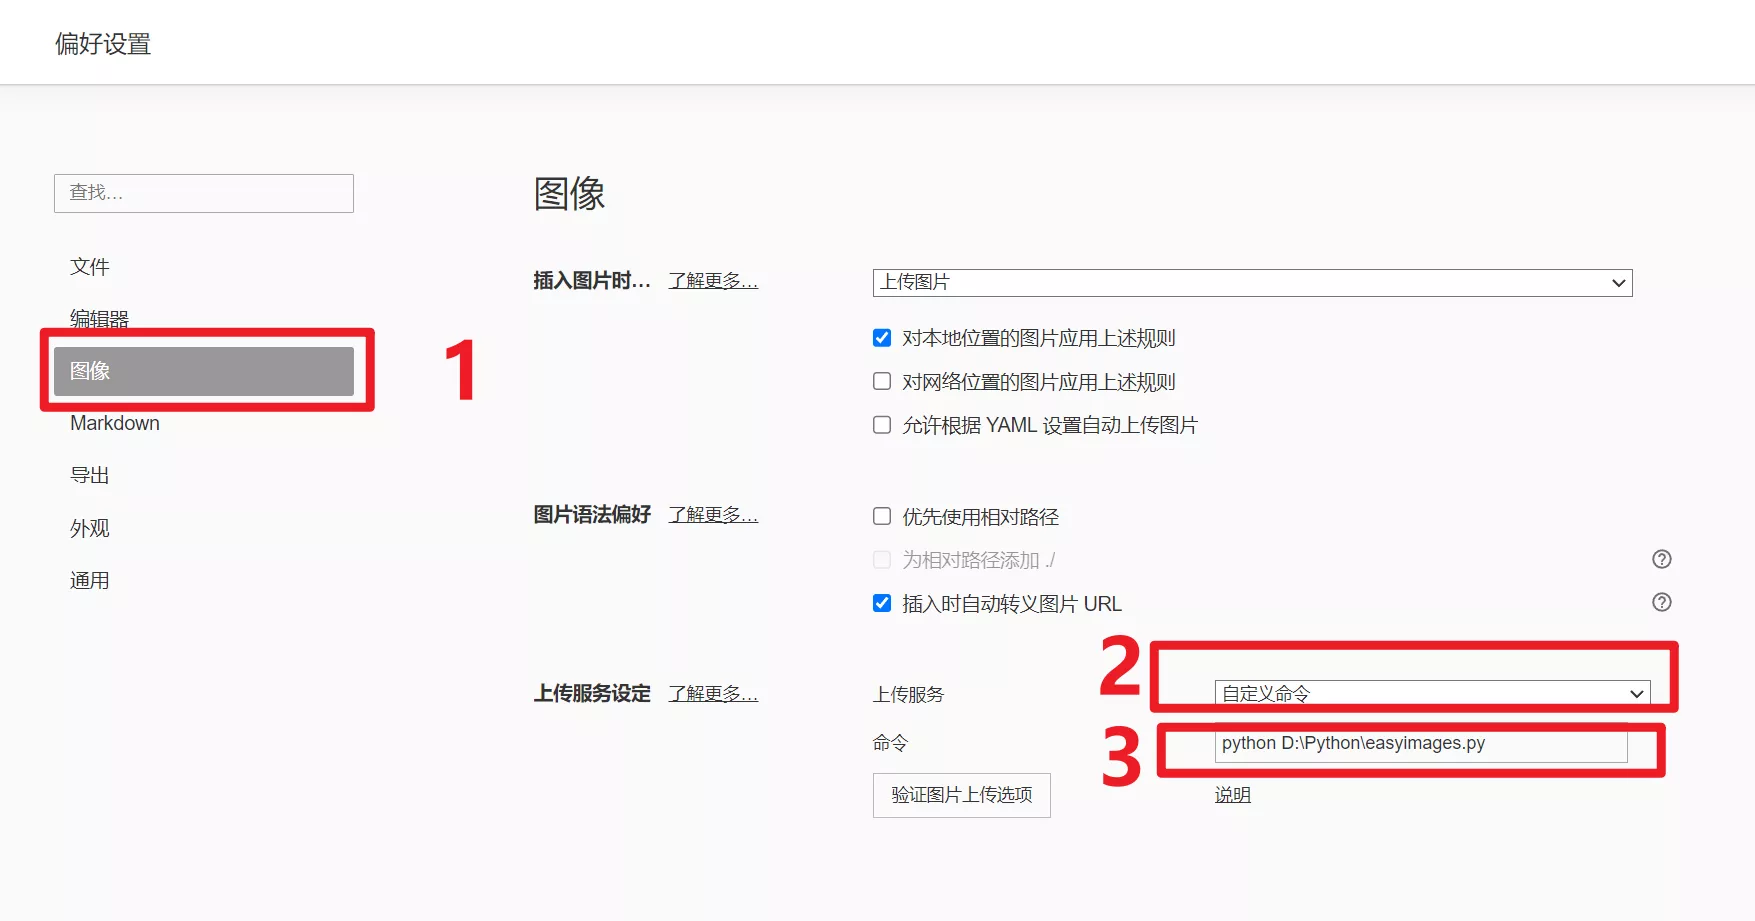
在Typora中设置自定义命令
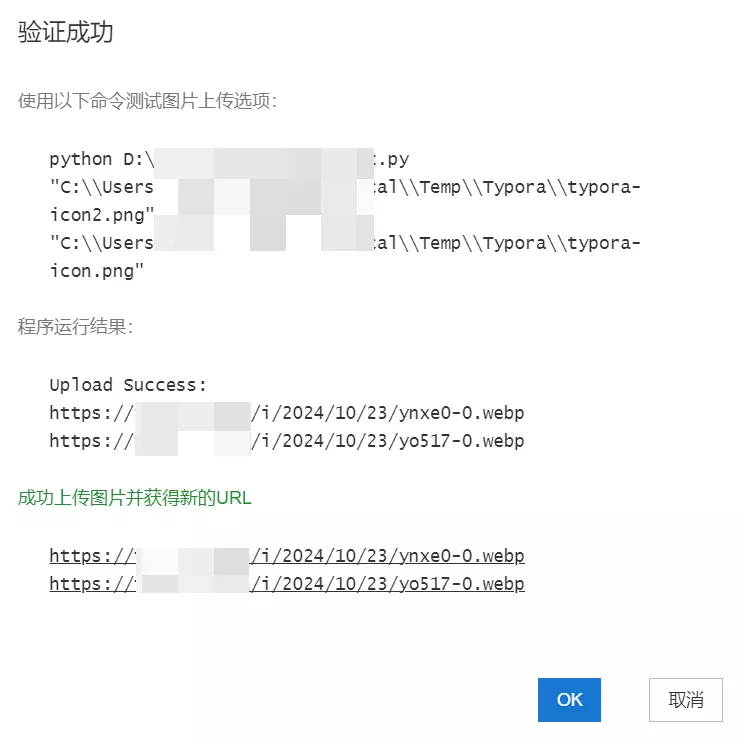
通过Typora上传测试
配置脚本运行环境
Windows
因为我平时python用的多,所以就选择了python作为脚本语言。
python环境配置的过程比较简单,就不多赘述了。
下载地址:Download Python | Python.org
新版Python会自动添加环境变量,不需要单独设置。
编辑脚本
import requests
import sys
def upload_image(img_path, token):
#目标URL
url = "你的api"
# 构建请求参数
with open(img_path, 'rb') as img_file:
files = {'image': img_file}
data = {'token': token}
# 发送POST请求
response = requests.post(url, files=files, data=data)
# 检查响应状态码
if response.status_code == 200:
json_data = response.json()
return json_data['url']
else:
print(f"Upload failed for {img_path} with status code {response.status_code}.")
return None
if __name__ == "__main__":
img_paths = sys.argv[1:]
token = "你的token" # 从实际来源获取token
# 存储成功的上传URL
success_urls = []
for img_path in img_paths:
url = upload_image(img_path, token)
if url:
success_urls.append(url)
if success_urls:
print("Upload Success:")
for url in success_urls:
print(url)在Typora中设置自定义命令


通过Typora上传测试


总结
完事了,搞定

